Capture Information
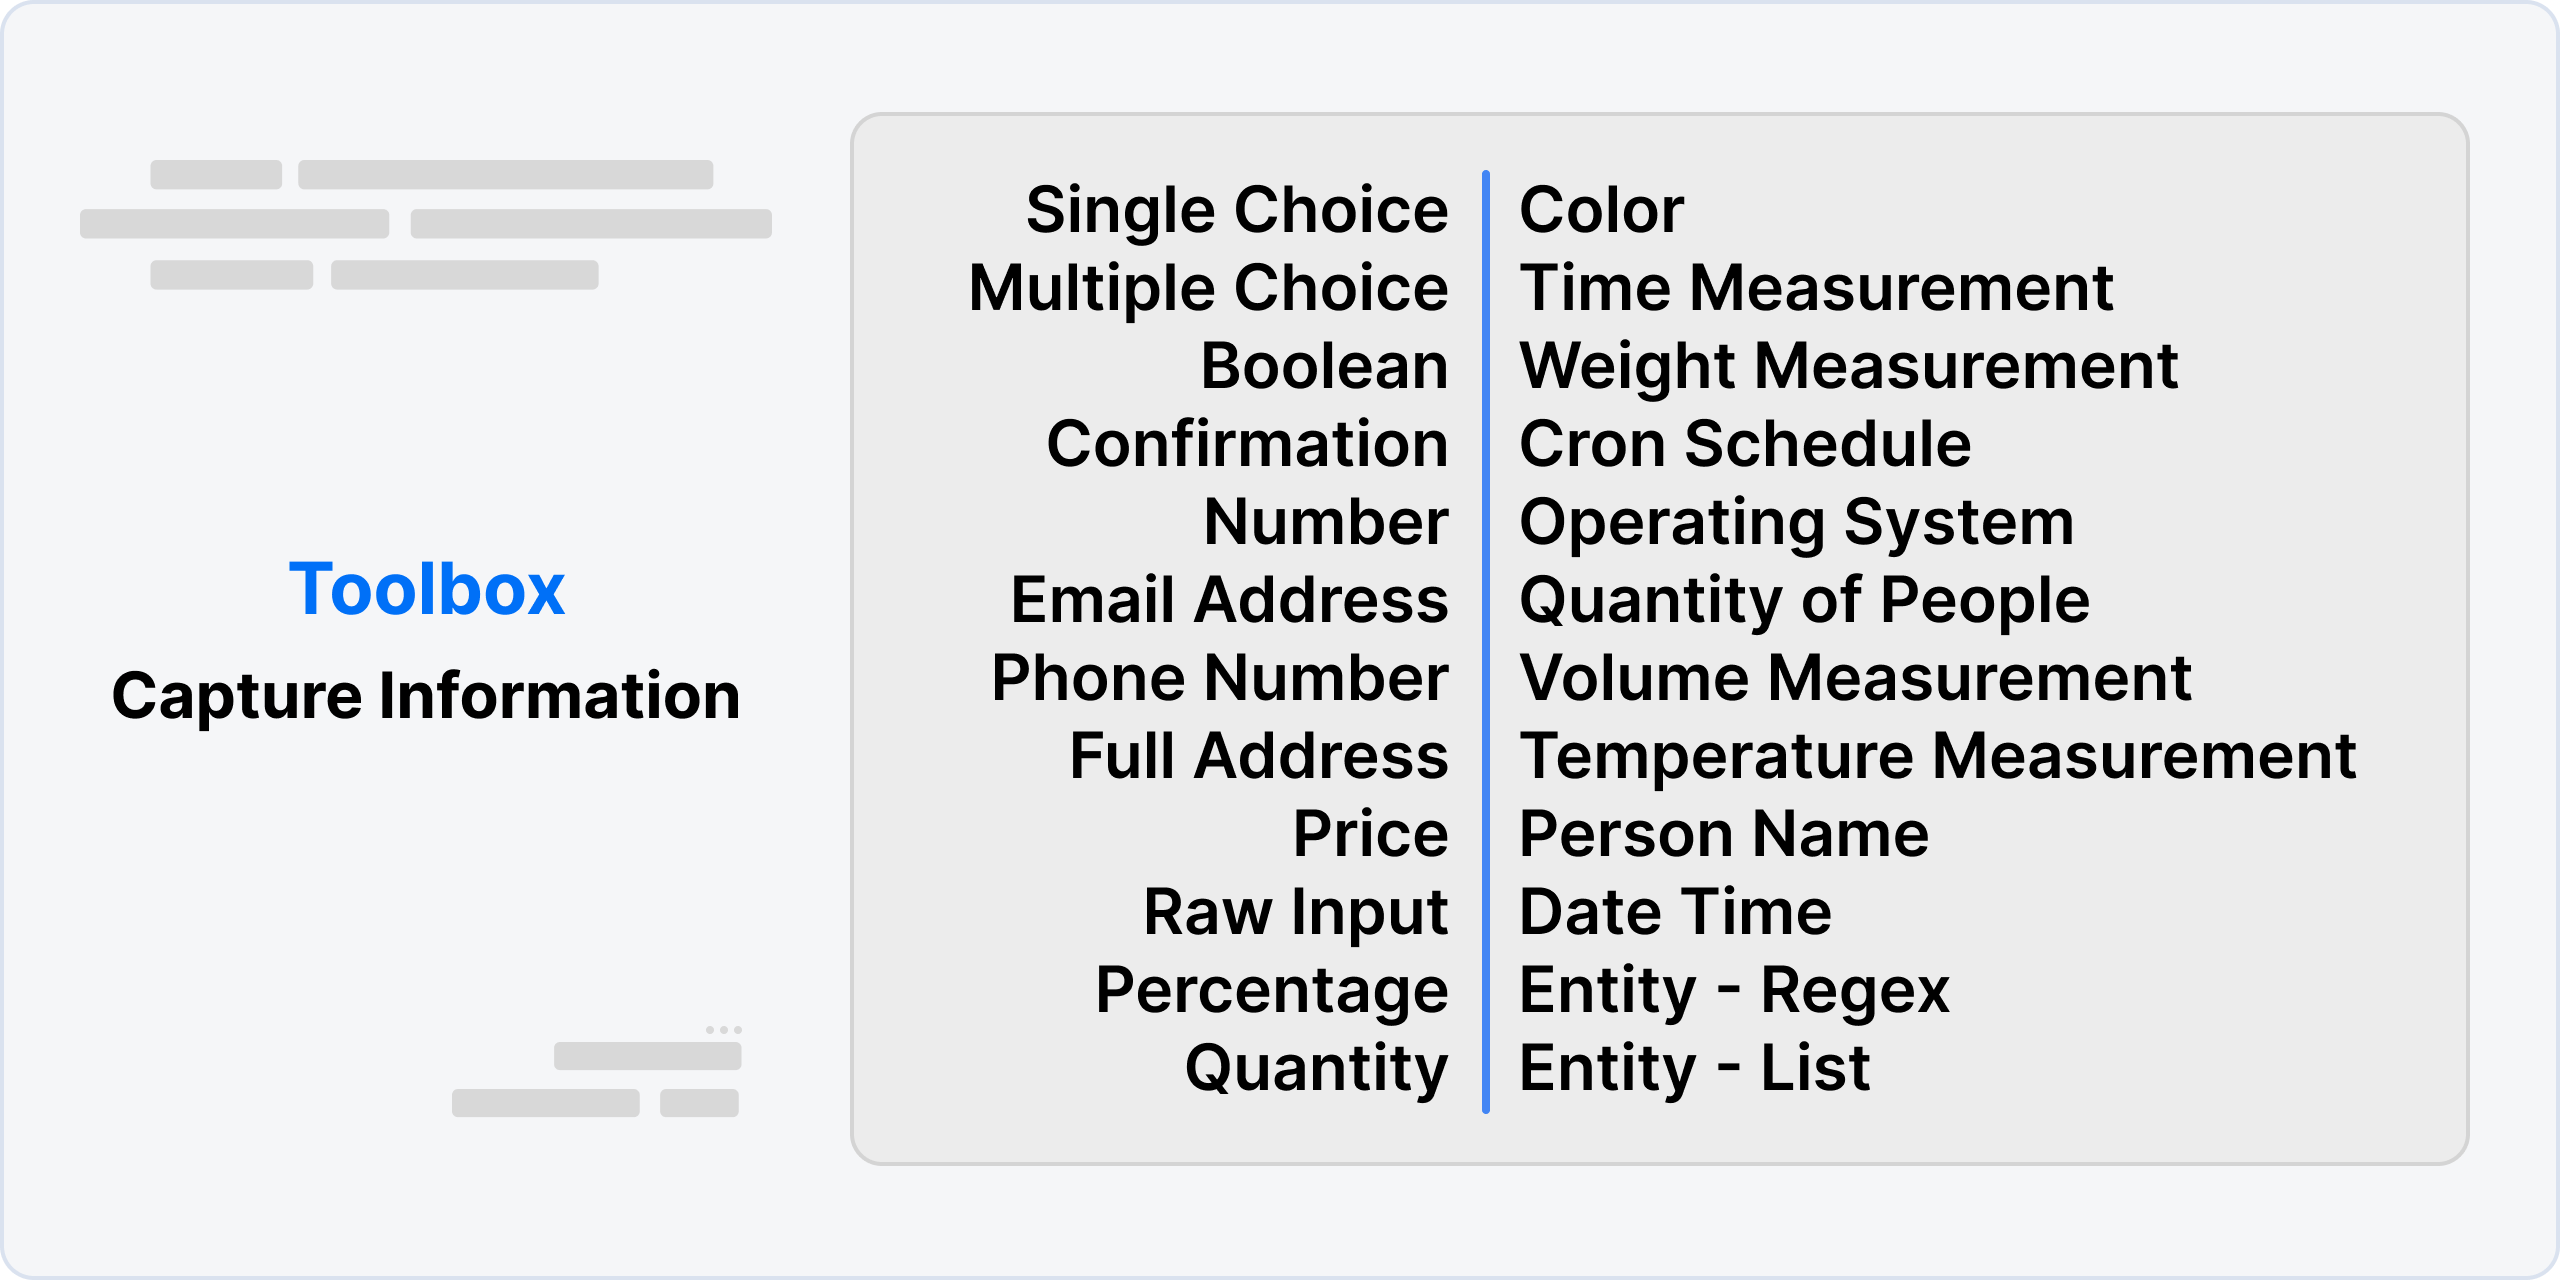
Capture Information Card is part of the Toolbox that allows the bot to stop processing and wait for the user's response while capturing a specific piece of information from the user's input.
This could include details like the user's name, full address, or raw input.
To collect multiple pieces of information, multiple prompt fields can be added to a single prompt node. Once the information is collected, a flow variable should be created to store the extracted information for later use in the conversation or to be passed on to other systems. This allows for a more personalized and efficient experience for the user, as well as providing valuable data for the chatbot's developers.
Prompt Field Types
A Prompt Field is a type of input field that is used to capture information from a user in a structured and organized manner. It can include various types of input fields such as Single Choice, Multiple Choice, Number, Email Address, Phone Number, and more.
The Prompt Field also includes validation messages and code validation, which helps ensure that the user inputs the correct type of information. This means that if the user inputs an invalid value, they will be notified with an error message and prompted to re-enter the correct information.
| Prompt Fields | Description & Extracted Information |
|---|---|
| SingleChoice | Extracts a Single Choice from a finite list of possible Values Variable Type: String |
| MultipleChoice | Extracts one or multiple choices from a finite list of possible Values Variable Type: String |
| Boolean | Extract a Boolean (On/Off) from the Query Variable Type: Boolean |
| Confirmation | Confirm a Yes/No question with a Boolean from the Query Variable Type: Boolean |
| Number | Extracts a Number from the Query Variable Type: Number |
| EmailAddress | Extracts a full Email Address from the Query Variable Type: String |
| PhoneNumber | Extracts a Telephone Number and optionally the Country Code from the Query Variable Type: String |
| FullAddress | Extract the Full Address from the Query Variable Type: Object |
| Price | Extracts a Price from the Query Variable Type: Number |
| RawInput | Extract the Input provided by the User, without any processing Variable Type: String |
| Percentage | Extracts a Percentage from the Query Variable Type: Number |
| Quantity | Extract a Quantity from a Query Variable Type: Number |
| Color | Extracts a Color as both HEX and RGB codes from the Query Variable Type: Object |
| TimeMeasurement | Extracts a time measurement as (ns, mu, ms, s, min, h, d, week, month, year) Units Variable Type: Number |
| WeightMeasurement | Extracts a Weight Measurement as (mcg, mg, g, kg, oz, lb, mt, t) Units Variable Type: Number |
| CronSchedule | Extracts a one-time or recurring schedule as a CRON Expression from the Query Variable Type: Object |
| OperatingSystem | Extracts the name of an Operating System (Windows, OSX, IOS, Android, Linux) Variable Type: Object |
| QuantityofPeople | Extracts the Number of People in a Query Variable Type: Number |
| VolumeMeasurement | Extracts a volume measurement as (mm3, cm3, ml, l, kl, m3, km3, tsp, Tbs, in3, fl-oz, cup, pnt, qt, gal, ft3, yd3) Units Variable Type: Number |
| TemperatureMeasurement | Extracts a Temperature Measurement as (C, K, F) Units Variable Type: Number |
| Person | Extracts the name of a person(first and last names) Variable Type: Object |
| DateTime | Extracts date and time relative to the current date Variable Type: Date |
Let's understand each prompt field in detail.
Single Choice
The Single Choice is a type of input field that presents the user with a list of options to choose from. The user can only select one option from the list, and their choice is then stored as a value in a variable. This variable can be used later in your workflow for further processing.
Tip
If the user enters text instead of clicking a button, the AI will search their text for any of the button options, and, if there is an option the user's text will be treated as if they clicked the button.
An example of Single Choice would be a survey question with multiple options, where the user selects one answer from the list.
Steps to use Single Choice Field
- Create a new capture information card.
- Set the Type property to Single Choice.
- Set the Variable name property to the name of the workflow variable you want to use to store the selected option.
- Set the Prompt message property to a message that lists the available options for the user to choose from.
- Click on the Advanced Configuration to add Choices.
Once the card is used, it will present the available options to the user and allow them to select only one. The selected option will be saved in the workflow variable you specified, and you can use it in other parts of your workflow to make decisions or take actions based on the user's choice.
Example
Let's say you want to ask the user about their preferred mode of transportation, and you have three options: car, bus, and bike. You can create a new capture information card with the following properties:
Type: Single Choice
Variable name: preferredTransportation
Prompt message: What is your preferred mode of transportation? Choose one from the following: car, bus, bike.
When the user selects their preferred mode of transportation, the Single Choice card will save the value in the preferredTransportation workflow variable. You can then use this variable to tailor the conversation based on the user's choice.
For example, if they choose bike, you can ask follow-up questions related to biking or suggest some scenic bike routes.
You can also use the value of the preferredTransportation variable in transitions. For example, if the user selects car, you can move them to a node related to car-related services or if they choose bus, you can move them to a node related to public transportation schedules.
Multi Choice
The Multi Choice type is a way to gather information from users by presenting them with a list of options to choose from. Users can select one or more options from the list.
This type of capture information is useful in scenarios where you want to give users a set of choices to pick from, like selecting the toppings for a pizza or the colors for a shirt. It's a quick and easy way to collect information from users without having to ask them to type out their answers.
Steps to use Multi Choice Field
- Create a new capture information card.
- Set the Type property to Multi Choice.
- Set the Variable name property to the name of the workflow variable you want to use to store the extracted values.
- Set the Prompt message property to a message that provides a list of choices for the user to select from.
- Click on the Advanced Configuration to add Choices.
Once the card is used, it will extract the selected options from the user's input and save them in the workflow variable you specified. You can then use this variable in other parts of your workflow to make decisions or take actions based on the user's response.
Example
Let's say you want to ask the user what toppings they want on their pizza. You can create a new capture information card with the following properties:
Type: Multi Choice
Variable name: pizzaToppings
Prompt message: What toppings would you like on your pizza? Please select all that apply: pepperoni, mushrooms, onions, olives, sausage.
When the user enters their response, the Multi Choice card will extract the selected options and save them in the pizzaToppings workflow variable. You can then use this variable in other parts of your workflow to make decisions or take actions based on the user's response.
For example, if the user selects pepperoni and mushrooms, you can use the pizzaToppings variable to customise their order and display a message like Your pizza with pepperoni and mushrooms is on the way!
Boolean
Boolean type extracts a binary value from the user's input and saves it in a variable of type boolean. The extracted information can include values like true and false, agree and disagree, accept and decline, or any other binary values.
Steps to use Boolean Field
- Create a new capture information card.
- Set the Type property to Boolean.
- Set the Variable name property to the name of the workflow variable you want to use to store the extracted boolean value.
- Set the Prompt message property to a message that prompts the user to enter a binary value.
- Optionally, you can edit the Choices property if you want to customize the binary values that the user can select. By default, the choices are Yes and No. When the user provides an input, the system will extract either a true or false value based on whether the user selects Yes or No.
Example
Let's say you want to ask the user if they agree to the terms and conditions of service. You can create a new capture information card with the following properties:
Type: Boolean
Variable name: agreeToTerms
Prompt message: Do you agree to the terms and conditions of our service? Please enter 'yes' or 'no'.
When the user enters their response, the Boolean card will extract the binary value and save it in the agreeToTerms workflow variable as either true or false. You can then use this variable in other parts of your workflow to decide whether to proceed with the service or not.
If the user agrees to the terms and conditions, you can submit their request or move them to the next node, but if they disagree, you can say something like 'Sorry to hear that' and end the conversation. This will display a message based on the user's response and whether they agreed to the terms and conditions or not.
Confirmation
The Confirmation type is a way to ask the user to confirm or agree to something. For example, you might use this type to confirm a user's purchase, agreement to terms and conditions, or confirmation of an appointment. When the user responds, the Confirmation type extracts a binary value (either true or false) and saves it in a variable. This allows you to use the user's confirmation or agreement later in your bot's logic.
Steps to use Confirmation Field
- Create a new capture information card.
- Set the Type property to Confirmation.
- Set the Variable name property to the name of the workflow variable you want to use to store the extracted boolean value.
- Set the Prompt message property to a message that prompts the user to confirm or agree to something.
- Optionally, you can edit the Choices property if you want to customize the binary values that the user can select. By default, the choices are Accept and Decline. When the user provides an input, the system will extract either a true or false value based on whether the user selects Accept or Decline.
Once the card is used, it will automatically extract the confirmation from the user's input and save it in the workflow variable you specified as a boolean value (true or false). You can then use this variable in other parts of your workflow to make decisions or take actions based on the user's confirmation.
Example
Let's say you want to ask the user if they want to proceed with a purchase. You can create a new capture information card with the following properties:
Type: Confirmation
Variable name: proceedWithPurchase
Prompt message: Are you sure you want to proceed with the purchase? Please enter 'Accept' or 'Decline'.
When the user enters their response, the Confirmation card will extract the confirmation and save it in the proceedWithPurchase workflow variable as either true or false. You can then use this variable in other parts of your workflow to decide whether to proceed with the purchase or not.
If the user confirms they want to proceed with the purchase, you can move them to the payment process node, but if they decline, you can say something like 'No problem, maybe next time!' and end the conversation. This will display a message based on the user's response and whether they confirmed to proceed with the purchase or not.
Number
TheNumber type extracts a numerical value from the user's input and saves it in a variable of type number.
The user can enter any numerical value, like a whole number or a decimal, and the bot will recognize and store it as a number. This can be used for calculations or any other purpose where a numerical value is needed.
Steps to use Number Field
- Create a new capture information card.
- Set the Type property to Number.
- Set the Variable name property to the name of the workflow variable you want to use to store the extracted numerical value.
- Set the Prompt message property to a message that prompts the user to enter a numerical value.
Once the card is used, it will automatically extract the numerical value from the user's input and save it in the workflow variable you specified as a numerical value (integer or decimal). You can then use this variable in other parts of your workflow to perform calculations or take actions based on the user's response.
Example
Imagine you are creating an online store that sells products to customers. You want to ask the user to enter the quantity of a certain product they want to purchase. To do this, you can create a form with a field that uses the Number type to capture the user's input.
For example, you can create a field with the following details:
Type: Number
Variable name: productQuantity
Prompt message: How many units of this product would you like to purchase?
When the user enters their response, the Number field will extract the numerical value and save it in the productQuantity variable as either an integer or decimal value. You can then use this variable in other parts of your workflow to calculate the total cost of the purchase.
For instance, if the product costs $10 per unit and the user entered 3 as the product quantity, you can calculate the total cost in an Execute Code Card as follows:
workflow.totalCost = workflow.productQuantity * $10
This will enable you to calculate the total cost of the purchase based on the user's input and display it to the user before they confirm their order.
Email Address
The EmailAddress type is used to extract an email address value from the user's input and save it in a variable of type string. This allows you to use the extracted email address in other parts of your bot's logic, such as sending an email confirmation or storing the email address for future use. The email address can be in any valid email address format, including with special characters such as dots, hyphens, and underscores.
Steps to use Email Address Field
- Create a new capture information card.
- Set the Type property to EmailAddress.
- Set the Variable name property to the name of the workflow variable you want to use to store the extracted email address value.
- Set the Prompt message property to a message that prompts the user to enter an email address.
Once the card is used, it will automatically extract the email address value from the user's input and save it in the workflow variable you specified as a string value. You can then use this variable in other parts of your workflow to send emails or perform other actions based on the user's response.
Example
Let's say you want to ask the user for their email address so that you can send them a newsletter. You can create a new capture information card with the following properties:
Type: EmailAddress
Variable name: userEmail
Prompt message: Please enter your email address to subscribe to our newsletter.
When the user enters their email address, the EmailAddress card will extract the value and save it in the userEmail workflow variable as a string. You can then use this variable in other parts of your workflow to add the user to your newsletter subscription list or perform other actions based on the user's response.
Phone Number
In this section, we'll discuss the PhoneNumber capture information type in Botpress. This type of capture information extracts only the phone number representing the user's input, excluding the country code, and saves it in a variable of type string.
Steps to use Phone Number Field
- Create a new capture information card.
- Set the Type property to PhoneNumber.
- Set the Variable name property to the name of the workflow variable you want to use to store the extracted phone number value.
- Set the Prompt message property to a message that prompts the user to enter a phone number.
Once the card is used, it will automatically extract the phone number from the user's input and save it in the workflow variable you specified as a string value. The extracted information will not include the country code, only the digits representing the phone number. You can then use this variable in other parts of your workflow to make decisions or take actions based on the user's phone number.
Example
Let's say you want to ask the user for their phone number to schedule a call with them. You can create a new capture information card with the following properties:
Type: PhoneNumber
Variable name: userPhoneNumber
Prompt message: Please enter your phone number so we can schedule a call with you.
When the user enters their response, the PhoneNumber card will extract the digits representing the phone number and save it in the userPhoneNumber workflow variable as a string. You can then use this variable in other parts of your workflow to schedule a call with the user.
FullAddress
FullAddress extracts the full address information from the user's input and saves it in a variable of type object. The extracted information contains the country, city, street, zip code, and house number.
Steps to use Full Address Field
- Create a new capture information card.
- Set the Type property to FullAddress.
- Set the Variable name property to the name of the workflow variable you want to use to store the extracted address information.
- Optionally, set the Prompt message property to a message that prompts the user to enter their address.
- Save the card.
Once the card is saved, it will automatically extract the full address information from the user's input and save it in the workflow variable you specified. You can then use this variable in other parts of your workflow by referencing the specific fields in the address object using the following syntax: {{workflow.variableName.country}}, {{workflow.variableName.city}}, {{workflow.variableName.street}}, {{workflow.variableName.zip}}, and {{workflow.variableName.number}}.
Example
Let's say you want to capture the user's full address to use in a shipping process. You can create a new capture information card with the following properties:
Type: FullAddress
Variable name: shippingAddress
Prompt message: **Please enter your full shipping address:**
When the user enters their address, the FullAddress card will extract the information and save it in the shippingAddress workflow variable. You can then use this variable in other parts of your workflow to complete the shipping process, such as sending an email confirmation to the user with their shipping details.
Here's an example of how you can use the extracted information in a message:
Thank you for your order! Your shipping address is: {{workflow.shippingAddress.number}}
{{workflow.shippingAddress.street}}, {{workflow.shippingAddress.city}}, {{workflow.shippingAddress.country}},
{{workflow.shippingAddress.zip}}
This will display the user's full address in a clear and easy-to-read format for both the user and the bot.
Price
Price extracts the price information from the user's input and saves it in a variable of type number. The extracted information contains the amount of money, regardless of the currency.
Steps to use Price Field
- Create a new capture information card.
- Set the Type property to Price.
- Set the Variable name property to the name of the workflow variable you want to use to store the extracted price information.
- Set the Prompt message property to a message that prompts the user to enter the price.
- Optionally, set the Default value property to a default price to be used if the user doesn't provide one.
- Save the card.
Once the card is saved, it will automatically extract the price information from the user's input and save it in the workflow variable you specified. You can then use this variable in other parts of your workflow to perform calculations or other operations that require the price information.
Example
Let's say you want to capture the user's price information to process a payment. You can create a new capture information card with the following properties:
Type: Price
Variable name: paymentAmount
Prompt message: Please enter the payment amount:
Default value: 0.00
When the user enters the price, the Price card will extract and save the information in the paymentAmount workflow variable. You can then use this variable in other parts of your workflow to process the payment, such as sending the payment information to a payment gateway.
Here's an example of how you can use the extracted information in a message:
Your payment amount is {{workflow.paymentAmount}}. Thank you for your payment!
This will display the user's payment amount in a clear and easy-to-read format for both the user and the bot.
Raw Input
The RawInput extracts the user's input as it is and saves it in a variable of type string. The extracted information can include any type of user input, including text, numbers, and special characters.
Steps to use Raw Input Field
- Create a new capture information card.
- Set the Type property to Raw Input.
- Set the Variable name property to the name of the workflow variable you want to use to store the extracted user input.
- Set the Prompt message property to a message that prompts the user to enter their input.
Once the card is used, it will automatically extract the user's input and save it in the workflow variable you specified as a string value. You can then use this variable in other parts of your workflow to process the user's input or display it back to them.
Example
Let's say you want your users to submit an issue for your product. You can create a new capture information card with the following properties:
Type: Raw Input
Variable name: issueDescription
Prompt message: Please describe the issue you are experiencing.
When the user enters the issue description, the Raw Input card will extract the user's input and save it in the issueDescription workflow variable as a string value. You can then use this variable in other parts of your workflow to log the issue or escalate it to the relevant team for resolution.
You can create a message node with the following text:
Thank you for reporting the issue: {{issueDescription}}. Our team will investigate the issue and get back to you with an
update as soon as possible.
This will acknowledge the issue and provide the user with an estimated time frame for resolution.
Answer from a Knowledge Base
The Raw Input card can also be used to search for answers in a Knowledge Base (KB) and answer the user's question directly. You can have it search across all available KBs or limit the search to a specific KB.
Searching All Knowledge Bases
To enable the search across all available Knowledge Bases when the user asks a question:
- Create a new capture information card with the Type set to Raw Input.
- Make sure the "Search in all KBs" option is selected.
- In the Prompt message property, enter a message that encourages the user to input their question (e.g., “What would you like to know?”).
- Store the user's input in a variable by setting the Variable name property (e.g.,
userQuery) if you want to use it later.
Once set up, the chatbot will automatically search all configured Knowledge Bases for the user's inputted question and display the answer, provided that the Knowledge Agent's manual answering feature is not enabled.
Searching a Particular Knowledge Base
For more targeted information retrieval, you may want to search within a specific KB:
- Create a new capture information card with the Type set to Raw Input.
- Deselect the "Search in all KBs" option.
- Provide the name of the KB you wish to search in the "KBs to search in" input field.
- In the Prompt message property, enter a prompt directing the user to ask their question.
- Set the Variable name property to save the user's query (e.g.,
userQuerySpecific) if you want to use it later.
After the user submits their question, the chatbot will automatically conduct a search within the specified Knowledge Base and display the relevant answer. This happens seamlessly without the need for an action card to trigger the search, assuming that manual answering is turned off for the Knowledge Agent.
Percentage
The Percentage extracts the decimal representing the percentage the user is using from the user's input and saves it in a variable of type number. The extracted information can include values like 50%, 75%, or any other percentage.
Steps to use Percentage Field
- Create a new capture information card.
- Set the Type property to Percentage.
- Set the Variable name property to the name of the workflow variable you want to use to store the extracted percentage value.
- Set the Prompt message property to a message that prompts the user to enter a percentage.
Once the card is used, it will automatically extract the decimal value representing the percentage from the user's input and save it in the workflow variable you specified as a number value. You can then use this variable in other parts of your workflow to make calculations or take actions based on the user's response.
Example
Let's say you want to ask the user what percentage discount they would like to apply to their purchase. You can create a new capture information card with the following properties:
Type: Percentage
Variable name: discountPercentage
Prompt message: **Please enter the percentage discount you would like to apply to your purchase.**
When the user enters their response, the Percentage card will extract the decimal value representing the percentage and save it in the discountPercentage workflow variable as a number. You can then use this variable in other parts of your workflow to calculate the discount or take actions based on the user's desired discount.
For example, if the user entered 50%, you could calculate the discount amount as follows:
discountAmount = totalPrice * (discountPercentage / 100)
This will calculate the discount amount based on the user's desired discount percentage and the total price of the purchase.
Quantity
The Quantity extracts the quantity information from the user's input and saves it in a variable of type number. For example, if the user inputs "I want to buy 5 apples" or "Give me 5 kilograms of apples", the function will extract the number 5 and store it as a numerical value, without regard to the different units of measurement used. This allows you to work with the quantity of the item, regardless of how the user expressed it.
Steps to use Quantity Field
- Create a new capture information card.
- Set the Type property to Quantity.
- Set the Variable name property to the name of the workflow variable you want to use to store the extracted quantity information.
- Set the Prompt message property to a message that prompts the user to enter the quantity.
Once the card is saved, it will automatically extract the quantity information from the user's input and save it in the workflow variable you specified. You can then use this variable in other parts of your workflow by referencing it using the following syntax: **{{workflow.variableName}}**.
Example
Let's say you want to capture the user's desired quantity of a product. You can create a new capture information card with the following properties:
Type: Quantity
Variable name: productQuantity
Prompt message: **How many units of the product do you want?**
When the user enters a valid quantity, the Quantity card will extract and save the information in the productQuantity workflow variable as a number. You can then use this variable in other parts of your workflow to calculate the total price or to check the stock availability.
Here's an example of how you can use the extracted information in a message:
Thank you for your order! Your total price is {{workflow.productQuantity * productPrice}}.
This will display the total price to the user based on the quantity they entered and the price of the product.
Color
The Color type extracts the color information from the user's input and saves it in a variable of type object. The extracted information contains the colour name, hexadecimal code, and RGB values.
Steps to use Color Field
- Create a new capture information card.
- Set the Type property to Color.
- Set the Variable name property to the name of the workflow variable you want to use to store the extracted colour information.
- Set the Prompt message property to a message that prompts the user to enter a colour.
Once the card is called will automatically extract the colour information from the user's input and save it in the workflow variable you specified. You can then use this variable in other parts of your workflow by referencing the specific fields in the colour object using the following syntax: {{workflow.variableName.colorName}}, {{workflow.variableName.hexCode}}, and {{workflow.variableName.rgb}}.
Example
Let's say you want to capture the user's favourite colour to use in a marketing campaign. You can create a new capture information card with the following properties:
Type: Color
Variable name: favoriteColor
Prompt message: Please enter your favourite colour:
When the user enters their favourite colour, the Color card will extract the information and save it in the favoriteColor workflow variable. You can then use this variable in other parts of your workflow to customise your marketing campaigns, such as using the colour in promotional materials or emails.
Here's an example of how you can use the extracted information in a message:
Thank you for telling us your favourite colour! We love {{workflow.favoriteColor.colorName}} too. The hexadecimal code
for {{workflow.favoriteColor.colorName}} is {{workflow.favoriteColor.hexCode}} and the RGB values are
{{workflow.favoriteColor.rgb}}.
This will display the user's favourite colour and its associated information in a personalised message, making the interaction with the bot more engaging and memorable.
Time Measurement
The TimeMeasurement type extracts date/duration values from the user's input and save it in a variable of type Number after converting it to the chosen format. The extracted information can include values like next week, in a month, after two months, in 15 days, in 2 working days, etc. This information can be useful for scheduling appointments, setting reminders, and much more.
Steps to use Time Measurement Field
- Create a new capture information card.
- Set the Type property to Time Measurement.
- Set the Variable name property to the name of the workflow variable you want to use to store the extracted time measurement value.
- Set the Prompt message property to a message that prompts the user to enter a date/duration value.
Once the card is used, it will automatically extract the date/duration value from the user's input and save it in the workflow variable you specified as a number value. The time measurement value will be converted to the chosen format (nanoseconds, microseconds, milliseconds, seconds, minutes, hours, days, weeks, months, or years). You can then use this variable in other parts of your workflow to schedule appointments or set reminders.
Available Formats
The following formats are available for the extracted time measurement value:
ns (nanoseconds)
mu (microseconds)
ms (milliseconds)
s (seconds)
min (minutes)
h (hours)
d (days)
week (weeks)
month (months)
year (years)
You can choose any of these formats based on your requirement.
Example
Let's say you want to schedule a meeting with a user based on their availability. You can create a new capture information card with the following properties:
Type: Time Measurement
Variable name: meetingTime
Prompt message: When are you available for a meeting? Please enter a date or duration (e.g. next week, in 2 days, in 30 minutes).
When the user enters their response, the Time Measurement card will extract the time measurement value and save it in the meetingTime workflow variable as a number value in the chosen format. You can then use this variable in other parts of your workflow to schedule the meeting accordingly.
If the user is available at the specified time, you can schedule the meeting and confirm the details with the user. If not, you can ask for their availability again.
This will allow you to schedule meetings with users based on their availability and improve their experience with your service.
Weight Measurement
The WeightMeasurement extracts weight information from the user's input and saves it in a variable of type number after converting it to the chosen format. The available formats are mcg, mg, g, kg, mt, oz, lb, t.
Steps to use Weight Measurement Field
- Create a new capture information card.
- Set the Type property to Weight Measurement.
- Set the Variable name property to the name of the workflow variable you want to use to store the extracted weight value.
- Set the Prompt message property to a message that prompts the user to enter a weight.
Once the card is used, it will automatically extract the weight information from the user's input and save it in the workflow variable you specified as a number value. The value is converted to the chosen format which is selected during the configuration of the card. You can then use this variable in other parts of your workflow to make decisions or take actions based on the user's response.
Available Formats
The available weight measurement formats are:
| mcg (microgram) | mg (milligram) | g (gram) | kg (kilogram) |
| mt (metric ton) | oz (ounce) | lb (pound) | t (ton) |
Example
Let's say you want to ask the user for their weight in kilograms. You can create a new capture information card with the following properties:
Type: Weight Measurement
Variable name: userWeight
Prompt message: Please enter your weight in kilograms.
When the user enters their response, the Weight Measurement card will extract the weight information and convert it to kilograms, saving it in the userWeight workflow variable as a number value. You can then use this variable in other parts of your workflow to decide what to do based on the user's response.
You can ask the user if they want to proceed if their weight is over a certain limit or if it falls under a certain range. You can also display the weight measurement in different formats by using a formatted node.
This will display the user's weight in the desired format and provide relevant information based on their response.
Cron Schedule
The CronSchedule type takes a specific interval of time that a user inputs and convert it into a format that a computer program can understand. This interval can be things like every 5 minutes or once a day at 3pm.
The Cron Schedule then saves this interval in two ways: first, in a format that follows the Cron convention (which is a standard way of representing time intervals in programming); and second, as a boolean value that indicates whether the interval should be repeated or not (for example, if the interval is "every 5 minutes," the Cron Schedule would set the repeatable property to true, whereas if the interval is "once a day at 3pm," the Cron Schedule would set the repeatable property to false).
This makes it easier for developers to program applications that need to run certain tasks at specific intervals of time.
Steps to use Cron Schedule Field
- Create a new capture information card.
- Set the Type property to Cron Schedule.
- Set the Variable name property to the name of the workflow variable you want to use to store the extracted cron interval.
- Set the Prompt message property to a message that prompts the user to enter the desired interval value.
Once the card is used, it will automatically extract the interval value from the user's input and save it in the workflow variable you specified as an object containing the cron interval and the repeatable boolean value.
Example
Let's say you want to ask the user for a cron schedule to trigger a certain event. You can create a new capture information card with the following properties:
Type: Cron Schedule
Variable name: cronSchedule
Prompt message: Please enter the interval in cron format, e.g. '0 \* \* \* \*' for every hour, and indicate whether this should be repeated or not with 'true' or 'false'.
When the user enters their response, the Cron Schedule card will extract the interval value and save it in the cronSchedule workflow variable as an object with two properties: the cron value, which represents the extracted interval in a cron format, and the repeatable boolean value, which indicates whether the interval should be repeated or not.
You can then use this variable in other parts of your workflow to set up the event trigger according to the user's input.
Operating System
The OperatingSystem type extracts the operating system the user is using from their input and saves it in a variable of type object. This information can be useful for troubleshooting issues specific to certain operating systems or for tailoring responses based on the user's operating system.
Steps to use Operating System Field
- Create a new capture information card.
- Set the Type property to Operating System.
- Set the Variable name property to the name of the workflow variable you want to use to store the extracted operating system.
- Set the Prompt message property to a message that prompts the user to enter their operating system.
Once the card is used, it will automatically extract the operating system from the user's input and save it in the workflow variable you specified as an object. The extracted information can include the name and version of the operating system.
Example
Let's say you want to ask the user about the operating system they are using to access your website. You can create a new capture information card with the following properties:
Type: OperatingSystem
Variable name: userOS
Prompt message: **What operating system are you using to access our website?
When the user enters their response, the Operating System card will extract the information and save it in the userOS workflow variable as an object that includes the name and version of their operating system.
You can then use this variable in other parts of your workflow to tailor responses or troubleshoot issues specific to their operating system.
Quantity of People
The QuantityofPeople type extracts a number representing the quantity of people from the user's input and saves it in a variable of type Number. The extracted information can include values like 1, 2, 3, and so on.
For example, if you are building a reservation system for a restaurant, you can use the QuantityofPeople type to ask the user how many people will be dining, and then save that number as a variable. This variable can then be used to ensure that the restaurant has enough seats available for the group, or to calculate the total cost of the meal based on the number of people.
Steps to use Quantity of People Field
- Create a new capture information card.
- Set the Type property to QuantityofPeople.
- Set the Variable name property to the name of the workflow variable you want to use to store the extracted number value.
- Set the Prompt message property to a message that prompts the user to enter a number representing the quantity of people.
Once the card is used, it will automatically extract the number value from the user's input and save it in the workflow variable you specified as a number. You can then use this variable in other parts of your workflow to make decisions or take actions based on the user's response.
Example
Let's say you want to ask the user how many people will be attending an event. You can create a new capture information card with the following properties:
Type: Quantity Of People
Variable name: numberOfAttendees
Prompt message: How many people will be attending the event?
When the user enters their response, the Quantity Of People card will extract the number value and save it in the numberOfAttendees workflow variable. You can then use this variable in other parts of your workflow to decide how many seats to reserve or how much food to order.
If the user enters a number greater than the available seats or food quantity, you can respond with something like 'Sorry, we don't have enough seats/food for that many people' and ask the user to enter a smaller number.
This will display a message based on the user's response and the availability of seats or food.
Volume Measurement
The VolumeMeasurement extracts a volume value from the user's input and saves it in a variable of type number. The extracted value can be converted to one of the several available formats based on the user's choice.
Steps to use Volume Measurement Field
- Create a new capture information card.
- Set the Type property to VolumeMeasurement.
- Set the Variable name property to the name of the workflow variable you want to use to store the extracted volume value.
- Set the Prompt message property to a message that prompts the user to enter a volume value.
Once the card is used, it will automatically extract the volume value from the user's input and save it in the workflow variable you specified as a number value. You can then use this variable in other parts of your workflow to perform calculations or use the value in responses to the user.
Available Formats
The following volume formats are available for conversion:
| Cubic millimeters (mm3) | Cubic centimeters (cm3) | Milliliters (ml) | Centiliters (cl) |
| Deciliters (dl) | Liters (l) | Kiloliters (kl) | Cubic meters (m3) |
| Cubic kilometers (km3) | Teaspoons (tsp) | Tablespoons (Tbs) | Cubic inches (in3) |
| Fluid ounces (fl-oz) | Cups (cup) | Pints (pnt) | Quarts (qt) |
| Gallons (gal) | Cubic feet (ft3) | Cubic yards (yd3) |
Example
Let's say you want to ask the user about the volume of a liquid they want to order. You can create a new capture information card with the following properties:
Type: VolumMeasurement
Variable name: liquidVolume
Prompt message: What is the volume of liquid you want to order? Please enter a number and choose a volume format from the following list: mm3, cm3, ml, cl, dl, l, kl, m3, km3, tsp, Tbs, in3, fl-oz, cup, pnt, qt, gal, ft3, yd3.
The Volume Measurement type extracts the volume value and save it in the liquidVolume workflow variable as a number value. The value will be converted to the format specified by the user. You can then use this variable in other parts of your workflow to perform calculations or use the value in responses to the user.
For example, you could use the liquidVolume variable to calculate the price of the liquid based on the volume and price per unit of volume, or you could use it in response to the user like Thank you for ordering {{workflow.liquidVolume}} ml of liquid. Your order will be delivered soon.
Temperature Measurement
The TemperatureMeasurement type extracts a temperature value from the user's input and saves it in a variable of type Number. The extracted temperature can be in any of the available formats: Celsius, Kelvin, or Fahrenheit.
Steps to use Temperature Measurement Field
- Create a new capture information card.
- Set the Type property to Temperature Measurement.
- Set the Variable name property to the name of the workflow variable you want to use to store the extracted temperature value.
- Set the Prompt message property to a message that prompts the user to enter a temperature value in any of the available formats.
Once the card is used, it will automatically extract the temperature value from the user's input, convert it to the chosen format, and save it in the workflow variable you specified as a number. You can then use this variable in other parts of your workflow to make decisions or take actions based on the user's response.
Available Formats
There are three temperature formats available in the TemperatureMeasurement capture information type. These are: Celsius (°C), Kelvin (K) & Fahrenheit (°F)
You can choose the format you want to use in the prompt message property of the capture information card.
Example
Let's say you want to ask the user for their body temperature. You can create a new capture information card with the following properties:
Type: TemperatureMeasurement
Variable name: bodyTemperature
Prompt message: Please enter your body temperature in Celsius (°C), Kelvin (K), or Fahrenheit (°F)
When the user enters their response, the Temperature Measurement card will extract the temperature value, convert it to the specified format, and save it in the bodyTemperature workflow variable as a Number. You can then use this variable in other parts of your workflow to decide what action to take based on the user's body temperature.
If the user's body temperature is higher than the normal range, you can send them to a doctor's appointment node. If not, you can proceed with the conversation as usual.
This will display a message based on the user's response and the action you decide to take based on their body temperature.
Person
The Person type is used to extract the name of a person from the user's input, such as when you ask the user for the name of a contact or a customer. Once the user enters the name, the Person type extracts the first and last names and saves them in a variable of type Object.
This extracted information can be used in other parts of your workflow to personalize messages or perform actions specific to that person, such as sending them an email or adding them to a mailing list.
Steps to use Person Field
- Create a new capture information card.
- Set the Type property to Person.
- Set the Variable name property to the name of the workflow variable you want to use to store the extracted name information.
- Optionally, set the Prompt message property to a message that prompts the user to enter their name.
- Save the card.
Once the card is saved, it will automatically extract the person's name information from the user's input and save it in the workflow variable you specified.
You can then use this variable in other parts of your workflow by referencing the specific fields in the name object using the following syntax:
{{workflow.variableName.first}} and {{workflow.variableName.last}}
Example
Let's say you want to capture the user's name to personalise a message. You can create a new capture information card with the following properties:
Type: Person
Variable name: userName
Prompt message: What's your name?
When the user enters their name, the Person card will extract and save the information in the userName workflow variable. You can then use this variable in other parts of your workflow to personalise your messages, such as greeting the user by name.
Here's an example of how you can use the extracted information in a message:
Hello {{workflow.userName.first}}, welcome to our website!
This will display a personalised greeting to the user with their first name.
DateTime
The DateTime capture information type in Botpress. This type of capture information extracts a date or duration value from the user's input and saves it in a variable of type Object. The extracted information can include values like next week, in a month, after two months, in 15 days, 2 working days, or any other date or duration value.
Steps to use DateTime Field
- Pick the DateTime Capture Information Card from the Cards.
- (Optional) - Add a question to ask. (e.g. when would you like to book an appointment?)
- Store the output in a variable.
Once the card is used, it will automatically extract the date or duration value from the user's input and save it in the workflow variable you specified as an object. You can then use this variable in other parts of your workflow to make decisions or take actions based on the user's response.
Example
Let's say you want to ask the user for their preferred date of booking a hotel room. You can create a new capture information card with the following properties:
Type: Datetime
Variable name: bookingDate
Prompt message: When would you like to book the room? Please enter a date or duration (e.g., next week, in a month, after two months, in 15 days, 2 working days).
When the user enters their response, the Datetime card will extract the date or duration value and save it in the bookingDate workflow variable as an object. You can then use this variable in other parts of your workflow to decide when to book the room or provide available dates for the user to choose from.
You can check the user's preferred booking date against your available dates to ensure the room is available for booking on that day. If the room is not available, you can offer other available dates or suggest another hotel that is available on the preferred date.
Formatting Date
const date = luxon.DateTime.fromJSDate(workflow.date)
// Default format of date is 2023-09-27T00:00:00.000Z

// Example 1: Display a Friendly, Human-readable Date Format
const friendlyFormat = date.toFormat('LLLL dd, yyyy')
console.log(`📅 Your requested date is: ${friendlyFormat}.`)
// Output: 📅 Your requested date is: September 27, 2023.

// Example 2: Display the Day of the Week
const dayOfWeek = date.toFormat('EEEE')
console.log(`📆 It falls on a: ${dayOfWeek}.`)
// Output: 📆 It falls on a: Wednesday.

// Example 3: Display the Date in Numeric Format
const numericDateFormat = date.toFormat('dd-MM-yyyy')
console.log(`🗓 Numeric Format: ${numericDateFormat}.`)
// Output: 🗓 Numeric Format: 27-09-2023.

// Example 4: Display the Date with Slashes
const slashDateFormat = date.toFormat('yyyy/MM/dd')
console.log(`📌 Slash Format: ${slashDateFormat}.`)
// Output: 📌 Slash Format: 2023/09/27.

// Example 5: Display the Date with Day and Month Name
const dayMonthNameFormat = date.toFormat('EEEE, dd of LLLL')
console.log(`🌟 Day and Month Name Format: ${dayMonthNameFormat}.`)
// Output: 🌟 Day and Month Name Format: Wednesday, 27 of September.
Wait for User Input
The Wait for User Input type is used to pause the flow of a conversation until the user enters a specific input. This can be useful when you want to wait for the user to enter a specific input before proceeding with the conversation.
Steps to use Wait for User Input Field
- Drag and drop the Wait for User Input card into your node.
- You can use
{{event.preview}}to display the fetched user's response after the user enters the input.
Custom Prompt Fields
Entity - Regex
The Entity - Regex type of capture information uses regular expressions to extract specific patterns of information from the user's input and saves it in a variable of type String. It's particularly useful for capturing sensitive information like credit card numbers, which have distinct patterns.
Steps to use Regex Field
- Create a new entity in the Entities section of your Botpress instance with a custom regular expression that matches the pattern of the information you want to capture.
- Create a new capture information card.
- Set the Type property to Entity Regex.
- Select the entity you created in Step 1 from the Entity dropdown.
- Set the Variable name property to the name of the workflow variable you want to use to store the extracted information.
- Set the Prompt message property to a message that prompts the user to enter the information you want to capture.
Once the card is used, it will automatically extract the information that matches the regular expression pattern from the user's input and save it in the workflow variable you specified as a string. You can then use this variable in other parts of your workflow to make decisions or take actions based on the user's input.
Example
Let's say you want to ask the user for their credit card number. You can create a new entity with a regular expression that matches the pattern of a credit card number, such as /(\d{4}-){3}\d{4}/ for a 16-digit credit card number in the format XXXX-XXXX-XXXX-XXXX. You can then create a new capture information card with the following properties:
Type: Entity Regex
Entity: Credit Card Number (the entity you created in step 1)
Variable name: creditCardNumber
Prompt message: Please enter your credit card number in the format XXXX-XXXX-XXXX-XXXX.
When the user enters their credit card number, the Entity Regex card will extract the credit card number that matches the regular expression pattern and save it in the creditCardNumber workflow variable as a string. You can then use this variable in other parts of your workflow to perform actions like validating the credit card number or sending it to a payment gateway.
It's important to note that the Contains sensitive data property is available for Entity Regex type, which will mask the data by * before saving it in the database, making it more secure.
Entity - List
In this section, we'll discuss the Entity - List capture information type in Botpress. This type of capture information extracts specific pieces of information from the user's input based on matching it with entries (or synonyms) in a custom entity list. This can be useful when you want to capture specific information like a person's name, location, or product name.
Steps to use List Field
- Create a new entity list under the library -> entities section.
- Add entries to the entity list and their synonyms.
- Create a new capture information card.
- Set the Type property to Entity List.
- Set the Variable name property to the name of the workflow variable you want to use to store the extracted information.
- Set the Prompt message property to a message that prompts the user to enter information that matches the entity list.
Once the card is used, it will automatically extract the information that matches an entry (or one of its synonyms) in the custom entity list from the user's input and save it in the workflow variable you specified. You can then use this variable in other parts of your workflow to make decisions or take actions based on the user's response.
Fuzzy matching options
Botpress offers three options for fuzzy matching:
- Strict: No errors allowed.
- Medium: Tolerates up to one error in words of four characters or more.
- Loose: Tolerates up to two errors in words of four characters or more.
This means that even if the user makes a typo or a slight error, the system can still match the input with an entry in the entity list.
Example
Let's say you want to ask the user for their favorite type of pizza. You can create a new entity list with entries like Pepperoni, Hawaiian, Margherita, and Vegetarian. Then, create a new capture information card with the following properties:
Type: Entity List
Variable name: favoritePizza
Prompt message: **What's your favorite type of pizza? Please enter the name of one of our popular pizza types.
When the user enters their response, the Entity List card will extract the information that matches an entry (or synonym) in the custom entity list and save it in the favoritePizza workflow variable. You can then use this variable in other parts of your workflow to make decisions or take actions based on the user's favorite pizza type.
For example, you could use this variable to direct the user to the pizza ordering process, or to suggest additional toppings based on their selection.
Advanced Configuration
Retries
The Retries setting helps the bot handle situations when it doesn't understand what the user is saying. It allows the bot to ask the user to provide the information again in a different way. This can improve the user's experience with the bot, increase engagement, and help the bot handle more conversations before giving up.
Number of retries
This is the maximum number of times the bot will ask the user to provide the information again before giving up and moving to the next card in the conversation or triggering the failure transition if enabled.
Retry message
This is the message that the bot will show to the user each time they fail to answer the question. It will ask the user to provide the information again in a different way. If the capture has predefined choices the retry message will contain the buttons again.
You can also add variables to this message using the following syntax:
Hello @workflow.userName.first, we did not get your number right, please enter it again!
Pro Tip
To give your users the best experience, you can combine the Retries option with the Add transition to handle failure flag. This will help the bot gracefully handle situations when it can't understand the user's input.
Example 1:
Let's say you have a card that asks the user to choose between Food and Drinks. If you set the Number of retries to 0 and the Add transition to handle failure flag is turned on, then if the user says I want Cars, the bot will redirect the user directly to the failure transition, where you can show a message like Sorry, I didn't understand that.
Example 2:
Now, let's change the example to have the Number of retries set to 2 and the Retry message set to Sorry, I didn't understand that, try to choose from the choices, and the Add transition to handle failure flag turned on. If the user says, I want Cars, the bot will respond with Sorry, I didn't understand that. Try to choose from the choices, and show the choices again.
If the user provides another message that is not related to the choices, the bot will retry again, up to a maximum of 2 retries. If the user still fails to provide the required information after the maximum retries, the bot will redirect the user directly to the failure transition, where you can have a message like Sorry, I didn't understand that.
Validation
The Validation setting allows you to verify that the user's input meets certain criteria before proceeding with the conversation. This can help ensure that the information collected is accurate and relevant to the conversation.
Properties
1. Label
The label property allows you to generate validation code based on plain natural language instructions. This can make it easier to set up the validation rules without needing to write code.
2. Code
If you prefer to write your own validation code, you can use the code property. This property allows you to write code to evaluate the user's input and determine whether it meets the validation criteria.
3. Validation failed message
If the user's input fails validation, you can customise the message that the bot sends to inform the user of the validation failure.
Steps to use Validation
To use the validation feature, you can add the validation properties to the Capture Information card in the Botpress interface. You can choose to use the Label or Code property to set up the validation rules.
Once the validation rules are set up, the user's input will be evaluated before proceeding with the conversation. If the input meets the validation criteria, the conversation will continue normally. If the input fails validation, the bot will send a message with the validation failed message you have specified.
Example 1:
Suppose you have a Capture Information card that asks the user for their age. You want to ensure that the user enters a number between 18 and 100. You can use the following validation code in the Validation section of the card:
function validate(input: string): boolean
{
  const age = parseInt(input) if (isNaN(age))
  { return false }
  return age >= 18 && age <= 100
}
This code first tries to parse the user's input as a number. If the input is not a valid number, the code returns false. Otherwise, it checks if the age is between 18 and 100 and returns true if it is.
Example 2:
Suppose you have a Capture Information card that asks the user for their email address. You want to ensure that the user enters a valid email address format. You can use the following validation code in the Validation section of the card:
function validate(input: string): boolean {
  const emailRegex = /^[^\s@]+@[^\s@]+\.[^\s@]+$/
  return emailRegex.test(input)
}
This code uses a regular expression to check if the user's input matches the format of a valid email address. If the input matches the format, the code returns true. Otherwise, it returns false.
Extract from History
The Extract from History setting allows the bot to extract values from previous messages in the conversation history. This can help the bot better understand the user's input and provide more accurate responses.
Property
Number of messages from history to extract from
This property determines how many messages in the conversation history the bot will try to extract the value from. A value of 0 means that the bot will not look back in the conversation history and will only use the user's most recent message. A value of 1 means that the bot will extract the value from the user's previous message, and so on.
Example:
Let's say you have a Capture Information card that asks the user for their favorite color. If the user has already mentioned their favorite color earlier in the conversation, you can use the Extract from History feature to extract the value from their previous message.
If you set the Number of messages from history to extract from to 1, the bot will extract the value from the user's previous message. If you set it to 2, the bot will extract the value from the message before that, and so on.
For example, if the user said My favorite color is blue earlier in the conversation and you set the Number of messages from history to extract from to 1, the bot will extract blue as the user's favorite color without asking the user again. This can save time and improve the user experience by avoiding repetitive questions.
Cancellation
The Cancellation setting can be used to break out of the conversation and cancel the Capture Information card. This can enhance the user's experience with the bot, making the conversation feel more natural and increasing engagement.
Properties
User can cancel the capture
With this option turned on, users can cancel the Capture Information card at any time during the conversation.
Confirm before cancelling
If you turn on this option, users will be asked to confirm whether they want to cancel the Capture Information card before it is cancelled.
Confirm cancel message
This option allows you to customise the message that the bot sends to confirm the user's decision to cancel the Capture Information card.
Example 1:
Suppose you have a Capture Information card that asks the user for their name and email address. If the user decides to cancel the conversation, the User can cancel the capture option will allow them to do so easily.
Example 2:
If you turn on the Confirm before cancelling option, the bot will ask the user if they are sure they want to cancel the Capture Information card before it is cancelled. If the user confirms the cancellation, the bot will send a message that you can customise using the Confirm cancel message option.
Choices
The Choices setting is used to offer a list of options to the user as a response to a Capture Information card. This can be useful when you want to restrict the user's input to a specific set of values or provide them with a list of options to choose from quickly.
You could add fixed options or add variables to each choice to make them dynamic. You can also render the list of choices dynamically by toggling the SuperText input and adding an array variable with the following format:
;[
  {
    label: 'French',
    value: 'fr',
  },
  {
    label: 'English',
    value: 'en',
  },
]
Limit
If you add more than 5 choices, they will be rendered as a Dropdown/List instead of buttons. This number may vary by channel.{' '} The choices labels should not be longer than 20 characters otherwise they will get cut in some channels.
Note
Choices are only available for Single Choice, Multiple Choice, Boolean, Confirmation and Raw InputCapture cards.
Example
Suppose you have a Capture Information card that asks the user to select their preferred mode of transportation - Car, Bus or Train. If you turn on the Choices option and specify these three options, the user will be presented with these options to choose from.
Advanced
**1. Add transition to handle failure
This is a yes/no flag that determines whether a transition should be added to handle cases where the Capture Information card fails to retrieve information from the user.
Example
If this flag is set to Yes and the Capture Information card fails to capture the required information, it will transition to the failure transition where a message can be displayed to the user, such as Sorry, I didn't understand that. Please try again.
**2. Skip if variable is already filled
This is a flag that determines whether the Capture Information card should be skipped if the variable assigned to it already has a value.
Example
If this flag is set to Yes and the variable already has a value, the Capture Information card will be skipped entirely, and the conversation will proceed to the next node.
This flag can be useful in scenarios where a user may have already provided the required information in a previous conversation with the bot.
Combining these two flags can help improve the user experience with the bot by allowing for smoother conversation flows and avoiding unnecessary repetition.
Prompt Chaining
Prompt Chaining allows you to extract multiple values from a single user message using multiple Capture Information cards in sequence. If a value was not found, the respective Capture Information card will ask for its value.
Chaining Multiple Prompts
To chain multiple Capture Information cards together, you need to follow these steps:
- Add the first Capture Information card to the flow.
- Set the Type property to the type of information you want to capture (e.g., Fullname).
- Set the Variable name property to the name of the workflow variable you want to use to store the extracted information (e.g., fullname).
- Set the Prompt message property to a message that prompts the user to enter the information (e.g., Please enter your full name).
- Set the Extract from history property to 1.
- Add the next Capture Information card to the flow.
- Repeat steps 1-6 for each additional Capture Information card you want to add, making sure to use a different variable name for each one.
Once the user enters a value, it will automatically extract the requested information from the user's message using each Capture Information card in sequence. If a value is not found for a particular Capture Information card, it will ask the user for the value before proceeding to the next node/card.
You can then use the extracted variables in other parts of your flow by referencing the specific variable names using the following syntax: {{workflow.variableName}}.
Example
Let's say you want to capture a user's full name, email address, and phone number. You can create a new flow with the following steps:
- Add a Capture Information card to the flow with the following properties:
Type: Fullname
Variable name: fullname
Prompt message: Please enter your full name
Extract from history: 1
- Add a second Capture Information card to the flow with the following properties:
Type: Email
Variable name: email
Prompt message: Please enter your email address
Extract from history: 1
- Add a third Capture Information card to the flow with the following properties:
Type: PhoneNumber
Variable name: phone
Prompt message: Please enter your phone number
Extract from history: 1
When the user sends a message, the flow will begin extracting the requested information from the user's message using each Capture Information card in sequence. If a value is not found for a particular Capture Information card, it will ask the user for the value before proceeding to the next card.
You can then use the extracted variables in other parts of your flow, such as sending a confirmation message to the user with their captured information:
Thank you for submitting your information!
We have your full name as {{workflow.fullname.first}} {{workflow.fullname.last}}, your email address as {{workflow.email}}, and your phone number as {{workflow.phone}}.
We'll be in touch soon!
This will display the user's captured information in a clear and easy-to-read format for both the user and the bot.
Updated about 2 months ago