Workflows
A flow allows you to break down a complex chatbot into multiple smaller flows. Breaking down the chatbot into multiple flows makes it easier to maintain, and you can re-use these flows when building other flows or even other chatbots.
A workflow always starts at its Entry Node At the beginning of each conversation, the Start Node of the Main flow of the Global Topic is the first to be executed. When the conversation reaches a node, Botpress will queue the active node's instructions and execute them in the order they were added to the node.
The flow is event-based and non-blocking by default, meaning it will execute all the nodes and instructions until it needs to wait
In other words, once the Entry Node is processed, the flow will continue to proceed to the next node in the flow until it reaches the very end of the flow or until a node needs to “wait” for user input.
Global Flows
Global flows in Botpress are essential components of the chatbot's functionality and cannot be deleted. These flows serve as the foundation for handling various important aspects of the chatbot's behavior and interactions.
While you cannot delete global flows, you can modify and customize them to suit your specific needs. You can add new actions, adjust the workflow logic, and incorporate additional functionality within the existing global flows. This allows you to extend the capabilities of the chatbot while maintaining the essential system-level functionality provided by the global flows.
Main
This is the primary conversation path that the chatbot follows in order to achieve its main purpose.
For example, if the chatbot is designed to provide customer service for a particular product, the Main Flow would include steps to gather information about the customer's issue, provide potential solutions, and ultimately resolve the problem.
The Main Flow is typically the most detailed and complex flow in the chatbot's design, as it needs to account for a wide range of possible inputs and scenarios.
Error
The Error Flow is designed to handle unexpected failures that may occur during the conversation. It will be triggered when there's technical issues including irrecoverable errors in the bot.
For example, if you have an Execute Code card with invalid Javascript code like workflow. = 'some value', or custom choices for Captures or Carousels in the wrong format, the Error flow shall be triggered.'
Info
To improve the user experience, you can add a Capture card of type Confirmation that asks the user if they want to resume the conversation. If the user says yes, you can redirect them to the Main flow (remember to reset the state to avoid entering an error loop), otherwise you can flow to the End node which will end the conversation.
It's also recommended to save these occurrences somehow so you can troubleshoot them later. You could use Tables to create a database of these occurrences, containing the conversation history provided by the Summary Agent and other relevant information.
Timeout
The Timeout Flow is triggered when the chatbot doesn't receive a response from the user for a certain period of time. Check out this article about the Timeout settings to learn more.
This can happen if the user gets distracted with something else or if there is a delay in their internet connection.
The Timeout Flow is important because it helps prevent the chatbot from appearing unresponsive or disconnected, which can lead to user frustration and disengagement. Learn more about the Inactivity Timeout setting.
Info
To improve the user experience, you can add a Text card in this flow that lets the user know the conversation is ending, alternatively add a Confirmation card asking if the user wants to continue the conversation. The timeout will then be reset and start counting down again. If the user says yes, you can redirect them to the Main flow (there is no way to know the previous flow), otherwise you can flow to the End node which will end the conversation.
Note
The default timeout is 30 minutes. So if the user doesn't respond for 30 minutes, this flow will be triggered.
Conversation End
The Conversation End Flow is designed to wrap up the conversation in a way that feels natural and satisfying to the user.
Depending on the context and purpose of the chatbot, this may involve thanking the user for their input and inviting them to provide feedback or continue the conversation later, or it may involve providing specific next steps for the user to take.
The Conversation End Flow is an important part of the chatbot design, as it helps create a positive user experience and encourages users to return in the future.
Please note
The bot will only enter the End flow if the conversation explicitly transitions to an End node. If the conversation ends because there are no valid transitions in a node it won't trigger the End flow.
Custom Workflow
It's important to note that you can create and manage custom workflows alongside the global flows to implement specific business logic and custom behavior. This way, you can enhance the chatbot's functionality without compromising the integrity of the global flows.
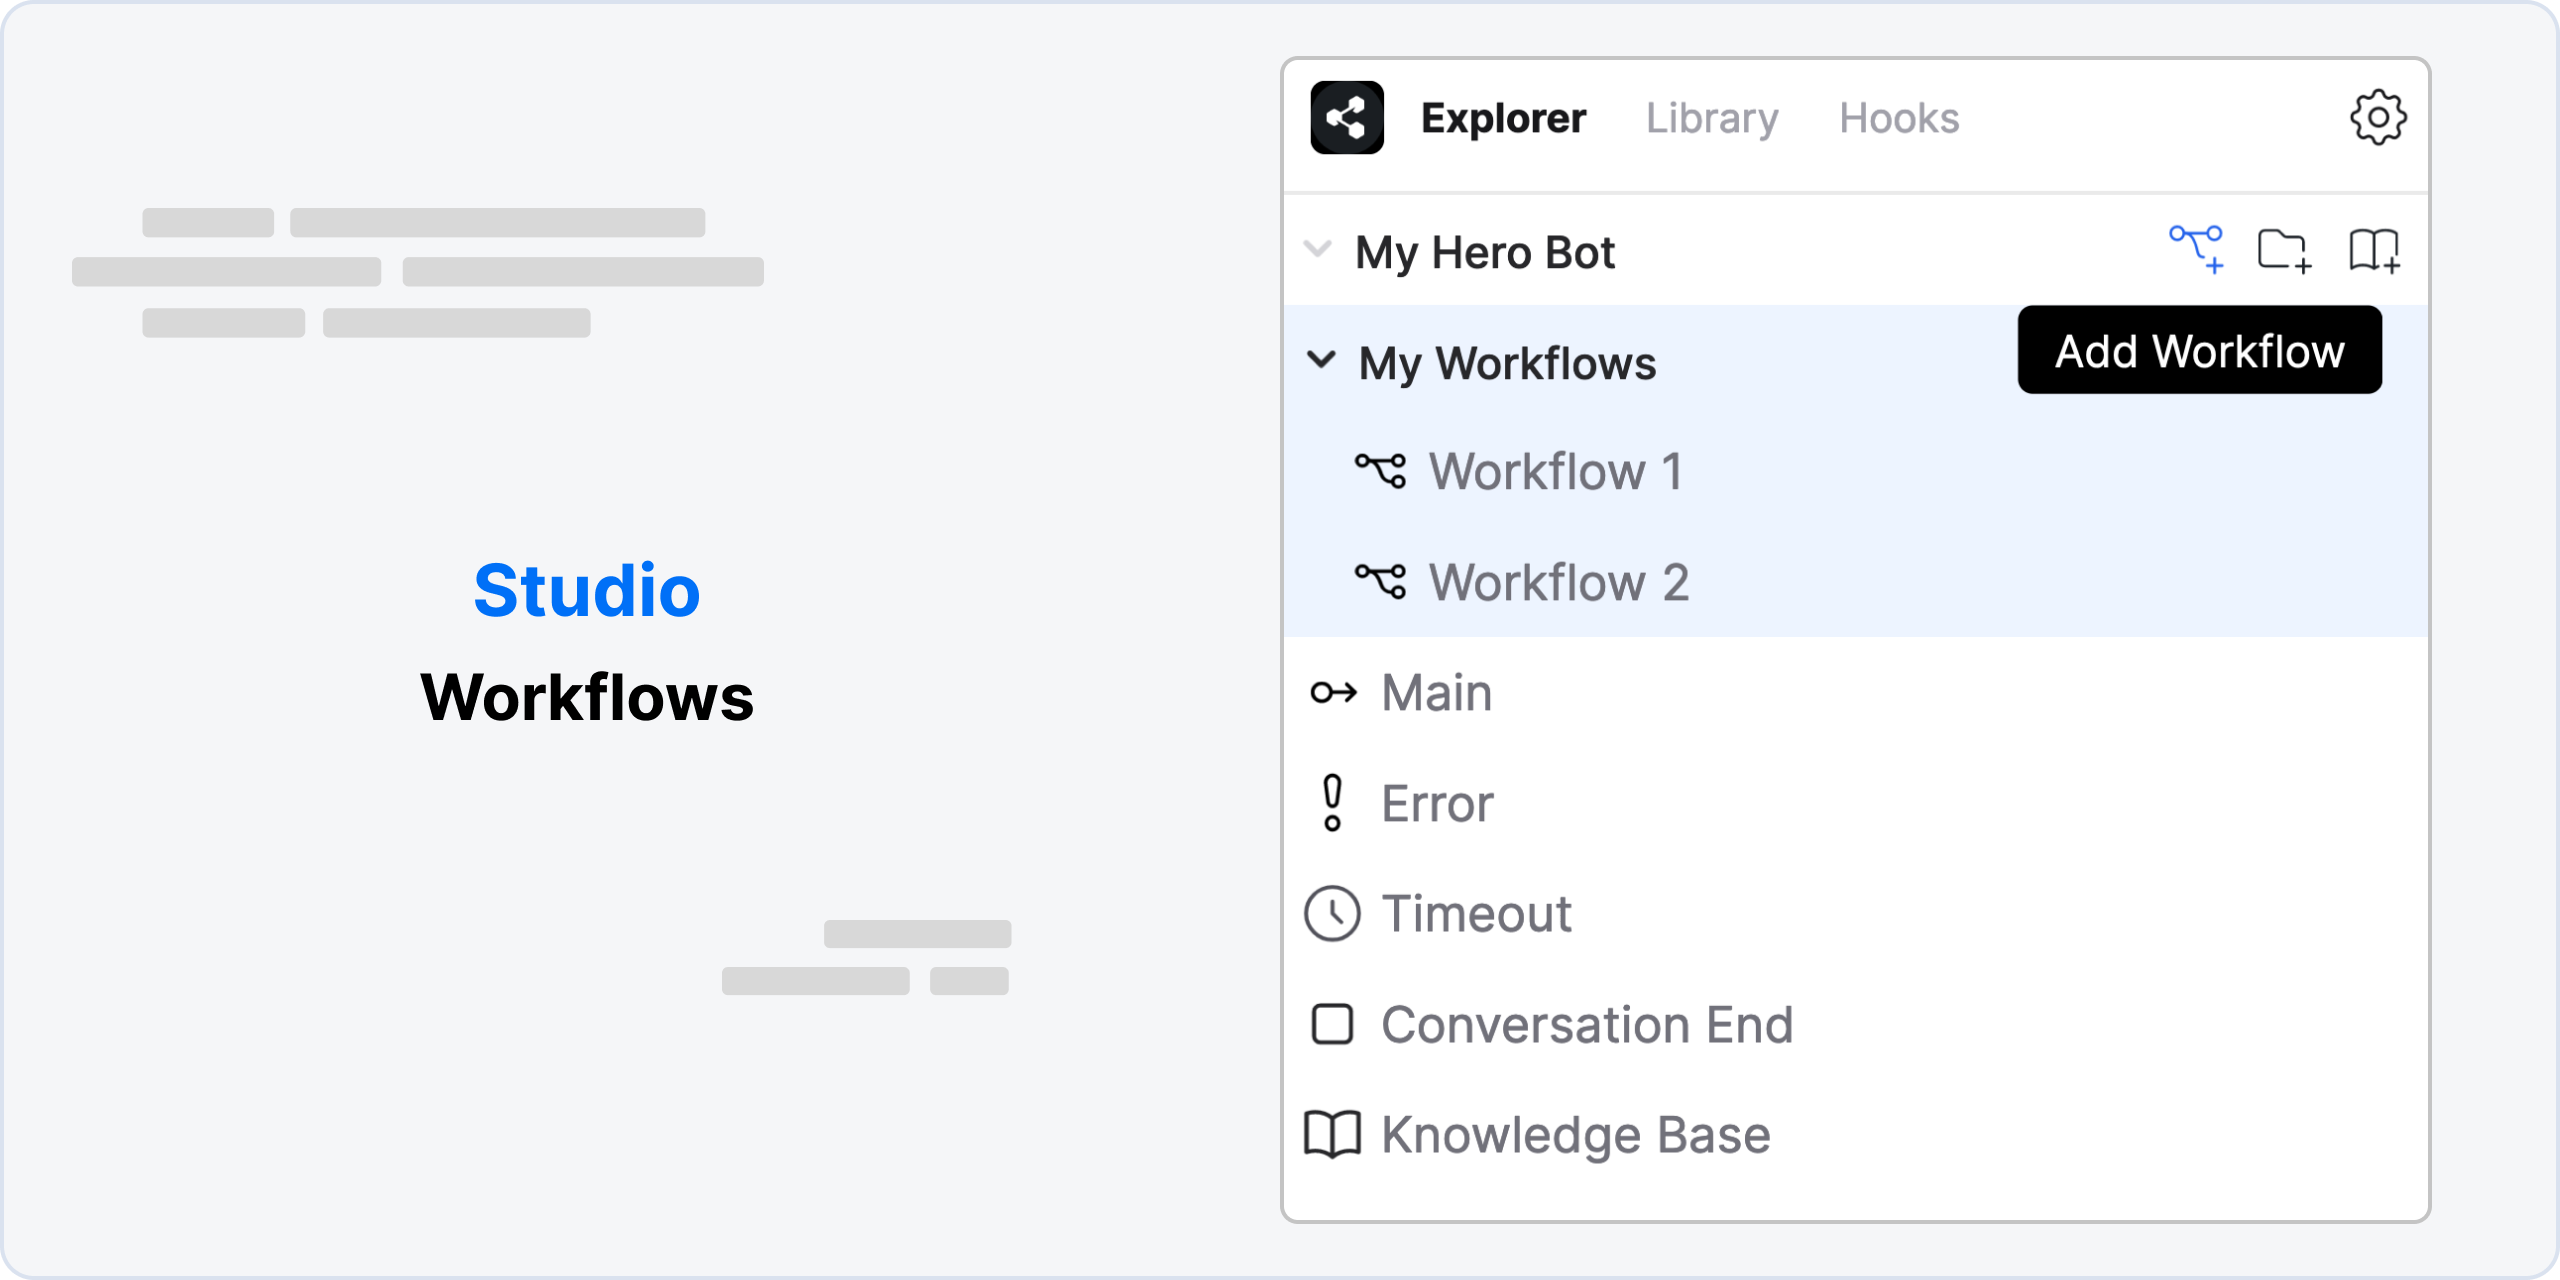
By clicking on the "Add Workflow" icon located at the top of the Explorer Menu, you gain the ability to create custom workflows for your chatbot. Workflows are a crucial aspect of chatbot development as they define the logic and flow of conversations between the bot and its users.
Creating custom workflows allows you to tailor the behavior of your chatbot according to your specific requirements and use cases.
Here are some key benefits and possibilities of creating custom workflows:
- Designing Conversational Flows: Workflows enable you to design conversational flows that guide the interaction between the chatbot and users. You can define the sequence of messages, questions, and responses to create engaging and meaningful conversations.
- Implementing Business Logic: Custom workflows empower you to incorporate complex business logic into your chatbot. You can define conditions, triggers, and actions based on user inputs or specific events to provide dynamic and context-aware responses.
- Integration with External Systems: Workflows allow you to integrate your chatbot with external systems and APIs. You can utilize custom workflows to fetch data from databases, invoke web services, or perform any other necessary operations to enrich the user experience and provide relevant information.
- Handling User Input: With custom workflows, you can capture and process user input in a structured manner. You can define prompts, validate input, and handle different scenarios based on user responses, ensuring a smooth and interactive conversation flow.
- Implementing Advanced Features: Custom workflows enable you to implement advanced features such as user authentication, session management, context preservation, and more. These features enhance the functionality and capabilities of your chatbot, allowing for a more sophisticated user experience.
Execute Workflow
After building a few flows, you'll quickly notice that there are some common patterns that you find yourself implementing over and over. These can be seen as reusable components between multiple flows. So, you can create Folders to categorise your workflows.
Once you have created your workflow, right-click in the Flow Editor, hover over the Execute Workflow option and select your workflow.
Workflow Variables
Learn more about using workflow variables
Limits
In order to keep workflows readable, we recommend you keep the number of nodes per flow low. We display a warning when you reach a great amount of nodes in a workflow.
Updated about 2 months ago