.webp)


- Great chatbot design blends UX, UI, and AI to create smooth, goal-driven conversations users actually enjoy.
- Successful bots embed naturally into user journeys and set clear expectations upfront.
- Designing good bots means researching real user needs, mapping journeys, and writing realistic dialogues before building.
- Continuous testing, analytics, and iteration turn a functional chatbot into one that truly drives results and user satisfaction.
When I was a kid, I spent hours designing Lego towns: tiny shops, winding roads, and those overly cheerful minifigurines. Back then, I thought all it took was a bucket of bricks. But the truth is, even Legos need design thinking.
Turns out, that same childhood instinct is the foundation of what I do now: building AI chatbots.
With a background in UI/UX and now working as an AI researcher at Botpress — the platform behind hundreds of thousands of deployed chatbots, including several award-winning chatbots — I’ve seen firsthand that technology alone isn’t enough.
What sets great chatbots apart is chatbot design.
This article shares the proven blueprint I’ve used to design chatbots that actually work. I’ll cover how chatbot design turns basic bots into great ones, what makes conversations flow, and how to build chatbots people enjoy using.
What is chatbot design?
Chatbot design is the intersection where user experience (UX), user interface (UI), and AI technologies like conversational AI come together to create effective AI chatbots and AI assistants.
The goal of chatbot design is to make chatbot conversations feel smoother, so users can easily get what they need without feeling lost.
Why does chatbot design matter?
Chatbot design matters because every chatbot interaction shapes how users perceive your product.
If the experience is confusing, users drop off. Worse, they leave with a negative impression of your brand. On the other hand, when the design works, customers come back.
And this matters more than ever because 67% of people have used a chatbot for customer support in the past year.
At Botpress, we helped VR Bank build an AI chatbot to handle complex mortgage and retirement flows — both highly regulated and historically manual processes.
By combining UX expertise, subject matter input, and smart natural language understanding, we created a chatbot that guides users through sensitive financial decisions and feeds data directly into their CRM.
Through this chatbot, we helped VR Bank save over €530,000 annually.
That’s what great chatbot design does. It makes interactions feel helpful and it directly impacts an organization's bottom line.
What’s the difference between chatbot UI design and chatbot UX design?
Chatbot UI design is about what the user sees, while chatbot UX design is about how the user feels during the interaction.
UI (user interface) includes things like the chat window, buttons, colors, icons, and message bubbles.
In short: UI makes the chatbot look good.
UX (user experience) is about the full user journey. It covers how clearly the bot communicates and how well it helps the user get from A to Z. UX also includes how the bot responds to mistakes.
In short: UX makes chatbots easy and enjoyable to use.
Chatbot UX Design Best Practices
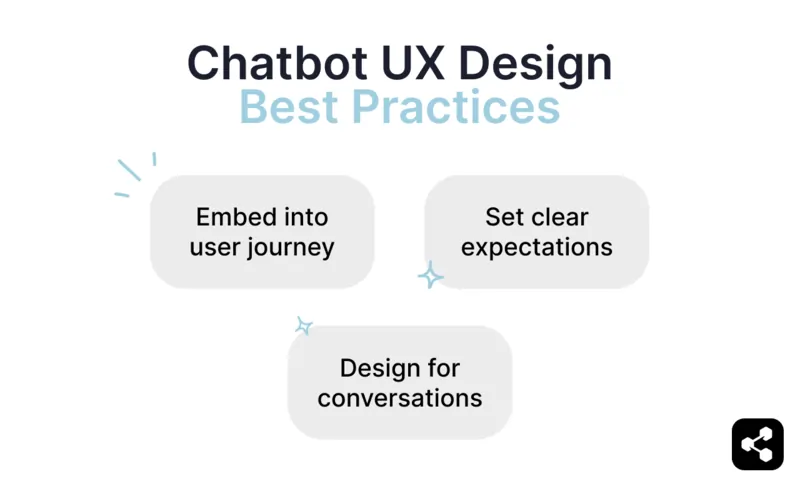
The way users interact with your bot can make or break whether they get the help they need or give up entirely.
The following best practices are the ones I’ve seen make the biggest difference in real-world bot deployments. They’re practical and essential to chatbot implementation.
Embed Into User Journey
The biggest mistake I see in chatbot deployments is treating the bot like a feature add-on.
Chatbots only create value when they’re embedded into the user journey, guiding people where they already want to go.
A perfect (and delicious) example of this is Fromeo, a chatbot we built for Les Producteurs de lait du Québec.
Fromeo sits front and center on the homepage of Fromages d’ici, acting as a digital “cheese butler” that invites users into an experience they didn’t know they needed.
Fromeo’s job? Help people navigate hundreds of Quebec cheeses by surfacing personalized recommendations through a conversation. Instead of forcing people to browse endless cheese categories, Fromeo meets them with an easy “What do you feel like today?” experience.
This is a textbook example of embedding a chatbot into a user’s flow. It turns a passive browsing session into an interactive, high-value journey.
Set Clear Expectations from the Start
Ruby Labs used this approach when scaling support across six subscription-based apps.
When a user opens their support chatbot, they’re instantly presented with four simple options:
- Cancel my account
- Billing questions
- Troubleshoot a technical issue
- Ask a general question
These buttons guide users toward successful outcomes by surfacing the most common needs right away.
It’s not about fancy tech. It’s about showing people, plainly, what the bot can help with.
This played a big part in Ruby Labs’ ability to automate over 4 million support sessions each month with a 98% resolution rate.
It’s also important to be honest about what the chatbot can’t do. If it doesn’t handle things like refunds or detailed account help, say so upfront.
Design for Conversational Flow
One of the reasons I find myself using ChatGPT so often is that the conversations feel natural.
ChatGPT pauses and responds in a way that feels like an actual back-and-forth. That pacing makes it easier to absorb information and stay engaged, especially when I’m asking complex questions.
That’s what good conversational flow looks like and is how I make chatbots sound more human.
Some other tips and tricks I use when it comes to designing conversational flow are:
- Keeping responses short and to the point
- Adding subtle pauses between messages so users have time to process what they’re seeing
How to Structure a Chatbot’s UX Design
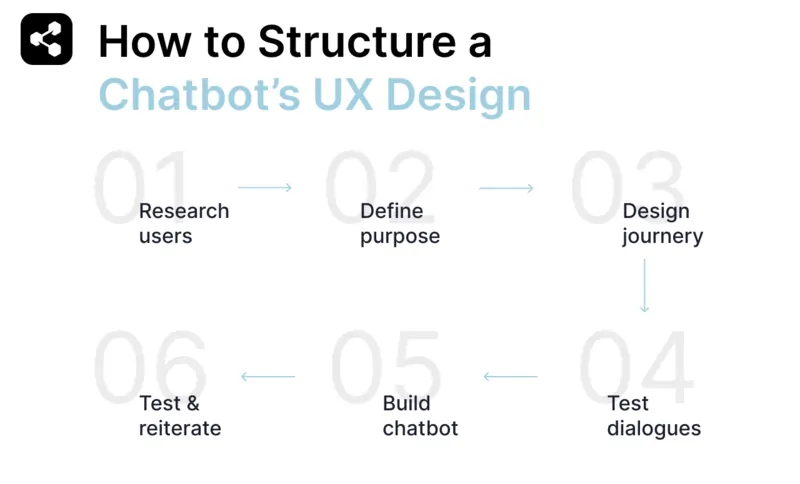
1. Deep-Dive into User Research and Intent Discovery
Before you sketch a flow or write a single message, you need to know who you’re designing for. Not in vague persona terms—real users, real goals, real friction.
This is where most bots fail: they’re built from assumptions, not evidence.
Start by answering three foundational questions:
- Who are the typical users? (e.g., new visitors, returning customers, employees?)
- What are their goals? (e.g., get help, make a purchase, track something, cancel a subscription?)
- What frustrates them in the current experience?
You won’t find these answers in a brainstorm. Talk to teams like customer support, sales, and product to hear where users struggle most.
Then look at support tickets, chat transcripts, or help center searches to find patterns.
Through this research, you’re building an intent map: a list of what your bot needs to handle, and how users naturally phrase those requests.
2. Define a Clear Purpose for Your Chatbot
Your chatbot doesn’t need to do everything. It just needs to do one thing really well.
Before you write a single message, identify the highest-impact use case — something users actually need and something your team can automate confidently.
You're looking for a process that hits the sweet spot:
- High frequency
- Annoys users
- Follows a predictable pattern
For example, in e-commerce, it's usually order tracking or product lookup: both are frequent, structured, and low-risk to automate.
Once you’ve locked in your focus, write a one-line mission for the bot. Something like: “Guide users through account cancellation with zero agent intervention in under two minutes.”
Now, define success numerically. Are you aiming for 80% automation? A drop in average handle time? Fewer escalations?
3. Design the End-to-End Chat Journey
Plan the entire user journey before you write a single message. This is the foundation of chatbot UX.
How to Map a Chatbot Journey Like a Pro
Here’s the process I follow on every project, whether it's for customer support, onboarding, or lead capture:
- Where does the user encounter the bot? Homepage? Help center? Checkout page?
- How will the bot recognize what the user wants? (keywords, buttons, user inputs)
- What happens after each intent? Sketch out all variations
- When and how does the flow end? Does it escalate, finish a task, or return data?
- What happens when something goes wrong?
Example Journey: Order Tracking Bot
Here's a basic flow for reference:
- [Welcome message]: “Hi there 👋 Want to track an order, check delivery status, or ask a question?”
→ Quick replies: “Track my order”, “Delivery info”, “Talk to support” - [User selects ‘Track my order’]
- [Bot prompts for order number]: “Sure! Can you enter your order number?”
- [Check database]
→ If found: “Your order is out for delivery and should arrive by 4 PM today.”
→ If not found: “Hmm, I couldn’t locate that number. Want to try again or contact support?” - [User action]
→ Try again or escalate to agent - [Conversation end]: “Glad I could help. Anything else before you go?”
4. Write and Test Sample Dialogues
Once you’ve mapped your chatbot’s flow, it’s time to get into the details that matter most: the actual words your bot says.
Here’s the rule I follow every time: If you can’t write a realistic sample conversation for an intent, you’re not ready to build it yet.
Start by scripting 3 to 5 sample dialogues for your top use cases: real, specific scenarios based on your user research. These should reflect actual language people use, not sanitized business copy.
For example:
- A user who’s just been double-charged and is frustrated.
- Someone trying to reset their password but isn’t getting the email.
- A first-time user who’s unsure how to cancel their trial.
Write the entire interaction, including edge cases and awkward detours. If someone gives a half-answer or goes off-script, how does the bot handle it?
Keep messages short and clear. Break up explanations into logical steps and use line breaks to improve scannability.
Once written, roleplay the dialogues with your team or better, with real users.
Read them aloud.
From watching logs of users interacting with the bot, see where people hesitate, misinterpret, or ask follow-up questions that your script didn’t anticipate. This is arguably the best way to improve flows.
5. Build Your Chatbot
Now that your flow and content are ready, it’s time to build your AI chatbot.
You’ll need:
- Welcome message
- Core intents (FAQ, account help, order lookup, etc.)
- Support handoff logic
- Retry and fallback handling
Your team should also decide how the bot will store data like order numbers or user preferences. Will it need to call APIs to fetch shipping data or calendar availability? Should it remember past interactions?
Integrate with tools like Calendly or Google Calendar for scheduling, Zendesk for support, and Stripe or Shopify for transactions. Custom APIs can help connect with your internal systems.
6. Continuously Test and Refine
Once your bot is live, you’ll learn fast what works and what doesn’t.
And for that, we can say: thank you, chatbot analytics.
Nothing beats real-world data from real users when it comes to improving your bot.
Some Key Metrics to Monitor Post-Launch:
- Most common intents
- High dropout nodes
- Repeated phrases that hit fallbacks
- Time per session / success rates
Pro Tip: Create a "Bot Improvement Log".
I recommend reviewing this log biweekly. Track updates and what impact they had. Retrain your intent recognition as new patterns emerge.
Best Tools for Chatbot UX Design
Planning & Mapping Tools
These help you sketch out the logic of a chatbot before you touch a line of code. They're ideal for visualizing flows and identifying edge cases.
Lucidchart
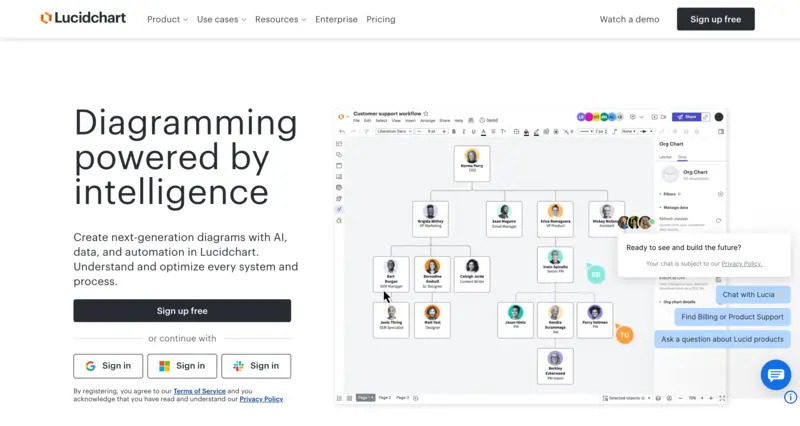
As someone who builds chatbots for fun (and works at an AI company), this is by far one of my favourite tools for planning conversations.
It’s great for creating detailed conversation trees, fallback paths, and decision logic.
I especially love using it when working with engineers or support teams because everything is super visual and easy to align on.
Bonus: the real-time collaboration is a dream for async team work.
Miro
I usually kick off chatbot design workshops in Miro. It’s great for dumping raw ideas like intents, and example phrasings into a visual playground.
If Lucidchart is where I formalize things, Miro is where the messy creative thinking happens. It’s also a great place to run early team brainstorms or capture user insights post-research.
Whimsical

This is my go-to when I want to build a quick conversation draft or just sketch a small feature flow.
It’s perfect when I’m working solo or need to show a concept to someone without a big “tool setup.”
It’s also great for keeping things clean and high-level without diving into nitty-gritty details too early.
Testing & Research Tools
No chatbot strategy is complete without testing real user interactions. These tools help you validate conversation design and gather feedback before launch.
PlaybookUX

I’ve used PlaybookUX to run unmoderated tests on chatbot prototypes, and it always gives me a goldmine of feedback.
You get user reactions and navigation behavior all without needing to schedule interviews.
It’s especially useful for spotting points where users misread the bot or take unexpected turns in the flow.
Maze
I like using Maze for fast signal testing.
When you just want to know: Did this flow make sense?
Lookback

Lookback supports live interviews and screen recordings so you can observe real-time reactions and usability issues.
Personally, I’ve caught tiny timing issues or unclear wording just by watching a user hesitate for three seconds mid-convo.
AI Chatbot Platforms
These are end-to-end platforms used during chatbot implementation to actually build and deploy conversational experiences. They often include tools for logic, integrations, and natural language handling.
Botpress

I build everything in Botpress: it hits the sweet spot between no-code and full developer flexibility.
Botpress offers a full-featured platform for building conversational AI with support for NLU, RAG, and custom flows.
The visual builder is intuitive for designers, and the platform supports real-time testing and debugging.
And it’s a strong fit for teams looking to go from concept to production with minimal code.
Best of all? It’s free!
Rasa
As someone who comes from a non-technical background, I will say that Rasa is more engineering-intensive. I’ve used Rasa for more ML-heavy, custom bots like when I needed full control over intent models.
But if your team has Python experience and needs to build something beyond drag-and-drop logic, Rasa is incredibly powerful.
Dialogflow
Dialogflow is great for simple bots or when your stack is already deep in Google Cloud.
I used it once to build a voice-enabled IT helpbot that tied into Google Calendar and Sheets.
It’s not as flexible for advanced flows or custom logic, but really smooth if your needs are straightforward.
Analytics & Optimization Tools
Once your chatbot is live, you’ll need insight into how it performs. Analytics tools track user behavior, conversation success, drop-off points, and more.
Botpress (built-in)
Another aspect of Botpress that I love is the built-in analytics tab.
It’s really easy to debug flows in context and see what users typed before the bot got confused.
Dashbot
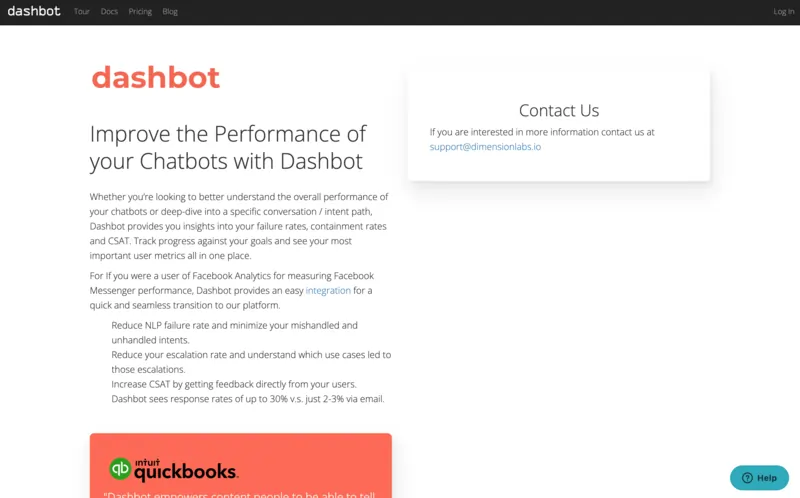
If you're running multiple bots or want a dedicated dashboard for engagement and performance, Dashbot is great.
It gives users structured insight into things like user retention and fallback triggers.
Google Analytics (custom events)

I highly recommend Google Analytics for marketing teams who want to see how the bot affects conversions, bounce rates, or overall page engagement.
It’s not chatbot-native, but it’s great for broader funnel analysis.
Design Smarter Chatbots
Chatbot design is the foundation of every great chatbot experience.
Botpress is an AI agent platform that gives everyone the tools to build and deploy intelligent agents with natural dialogue.
With built-in design tools, reusable templates, and a powerful NLU engine, Botpress makes it easy to create bots that not only work but feel human.
Start building today. It’s free.
FAQs
How long does it take to design and launch a chatbot?
Designing and launching a well-functioning chatbot can take anywhere from a few hours to several weeks, depending on complexity. Simple FAQ bots might go live in 2 to 3 hours, while more advanced bots handling complex tasks can take a couple of days or more to ensure quality and reliability.
Do I need coding skills to design a chatbot?
Coding skills aren’t strictly required for chatbot design, thanks to visual builders and no-code tools offered by platforms like Botpress (or Dialogflow). However, complex integrations or specialized features often benefit from developer support to extend a bot’s capabilities.
Can a chatbot handle multiple languages or dialects in the same bot?
A chatbot can handle multiple languages or dialects in the same bot if it’s designed using multilingual natural language understanding (NLU) models and supports language-specific training data. Many modern chatbot platforms offer built-in multilingual capabilities, but you’ll still need to plan translations carefully and test for nuances in phrasing, cultural context, and user expectations across different regions.
How can I measure whether my chatbot design is successful after launch?
Chatbot design success is measured post-launch using metrics like task completion rates, user satisfaction scores, fallback rates, and average resolution time. Conversation logs and user feedback help identify points of friction and overall effectiveness.
What common mistakes should I avoid when designing chatbot conversations?
Common mistakes in chatbot design include using robotic or overly formal language, not clarifying the bot’s capabilities, creating rigid flows that ignore unexpected inputs, and lacking effective fallback messages. Testing with real users helps ensure natural conversations and smooth, helpful interactions.