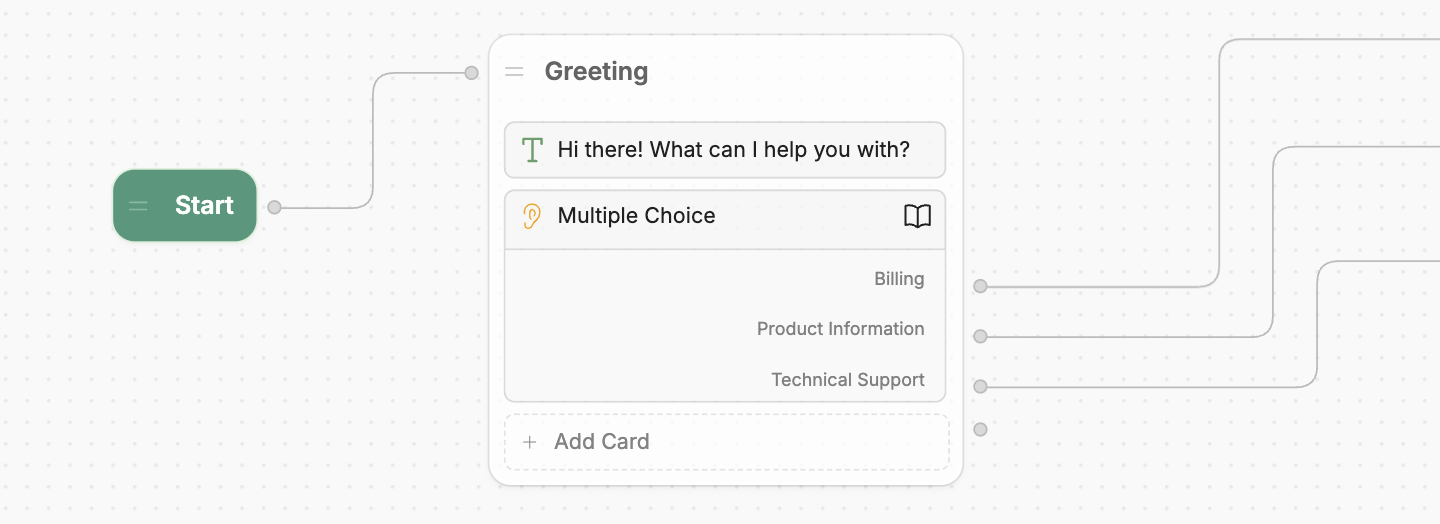
Overview
An individual Node’s behaviour depends on what Cards it contains. You can add any combination of Cards to a Node to achieve your desired behaviour. A Node transitions to the next Node when either:- It finishes executing all its Cards
- One of its Cards manually transitions to a new Node. You can set up manual transitions based on user choice, true/false conditions, and more.
Some Nodes have specific properties that make them behave differently—check out Types of Node for
more details.
A group of Nodes is called a Workflow. You can use Workflows to organize your bot’s
behaviour.
Usage
Add a Node
To add a new Node:- Right-click anywhere in a Workflow.
- Select a type of Node from the popup menu.
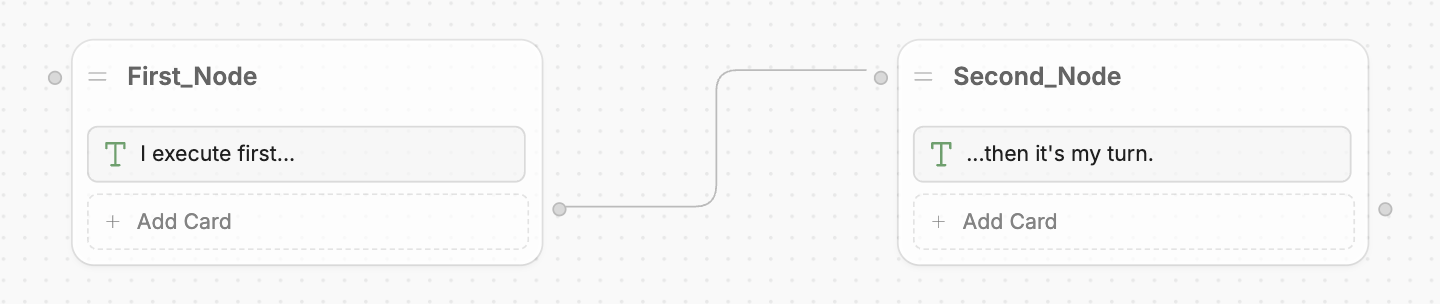
Transition between Nodes
To create a transition between two Nodes:- Select and hold the right edge of the Node you want to transition from.
- Drag outwards, then release on the left edge of the Node you want to transition to. This will create a transition between the two Nodes:
Move a Node
To move a Node around your Workflow, just drag and drop it wherever you like.Rename a Node
To rename a Node, just select its title and type in a new name.Test a Node
You can test a specific Node in the Studio’s Emulator. Just select any Node, then press the Play button to start a conversation with your bot from that Node.Copy/Delete a Node
Right-click any Node to copy or delete it.Types of Node
Nodes behave differently and have different available Cards based on their type. Here’s a breakdown of each type of Node:Standard Node
Standard Nodes execute each of their Cards one-by-one, then transition to the next Node. They’re the most basic type of Node, and are useful when you need full control over your bot’s behaviour.Autonomous Node
The Autonomous Node uses AI to make decisions—like what your bot should say or what tools it should use. Unlike a standard Node, which executes its Cards one by one, the Autonomous Node uses a Large Language Model (LLM) to decide when to execute its Cards. It can understand the conversation’s context, write responses to users, and leverage the tools you give it.For more information, check out the Autonomous Node guide.
Start Node
The Start Node is the entrance point to every conversation with your bot. It’s only available in the Main Workflow, can’t be modified/deleted, and can’t use Cards. You can select the Start Node to configure:- Which Knowledge Base your bot has access to
- Whether your bot has access to the Vision Agent
Entry Node
The Entry Node is the start of every Workflow in your bot (except for the Main Workflow). It executes whenever you transition to a new Workflow and can’t be deleted. The only Cards you can add to an Entry Node are:- Expression/Intent Cards
- Log Cards
You can toggle variables within an Entry Node—check out the guide to passing variables between
Workflows for more information.
Exit Node
The Exit Node is the end of every custom Workflow in your bot (built-in Workflows end with an End Node instead). It defines the exit point for the Workflow—each custom Workflow must contain at least one Exit Node. Exit Nodes can’t use Cards.You can configure the Exit Node to pass a variable back to its parent Workflow—check out the guide to passing
variables between Workflows for more information.
End Node
The End Node is the end point of every conversation with your bot. It has no configuration options and can’t use Cards. Only End Nodes can explicitly end a conversation, which:- Clears the conversation session
- Erases all variables and user data
- Resets the bot to its initial state.
Triggers
Triggers are a special kind of Node that only execute when a certain event occurs. They’re different from regular Nodes in a few ways:- You can’t transition from a regular Node to a Trigger. Any Triggers in your Workflow will only execute when the event they listen for occurs.
- Unlike other Nodes, you can’t add or remove Cards from a Trigger. Each Trigger is built around a single Card that determines when it executes.
For more information, check out the Triggers guide.